This guide provides instructions for using the Sequence Builder. The Sequence Builder is where you set up your Outreach Campaigns (or other sequences/workflows), the stages in the sequence, what will happen in the stages (actions), content creation/addition and what will happen when you get replies etc.
A sequence in LeadJabber is basically a workflow, consisting of stages and actions.
When you set up a sequence, you first add the stages, how long a stage will last before the contact(s) move to the next stage (for example 7 days) and a scheduled time of executing the actions in the stage. Then you repeat this process until you have all the stages and actions ready.
After you are finished setting up the stages and actions, you finish by choosing general settings (who is responsible for the sequence, what will happen when someone replies etc).
After you have created a sequence, you can add contacts to the sequence via the Workflow Manager, either a single existing contact, a list of contacts or you can create a new contact “on the fly” while working.
You can read more about adding and removing contacts to and from the sequences here.
To create a sequence and the first stage, navigate to “Sequences” and choose “New Sequence”. This will open up the sequence builder, and show you the stage settings for the first stage:
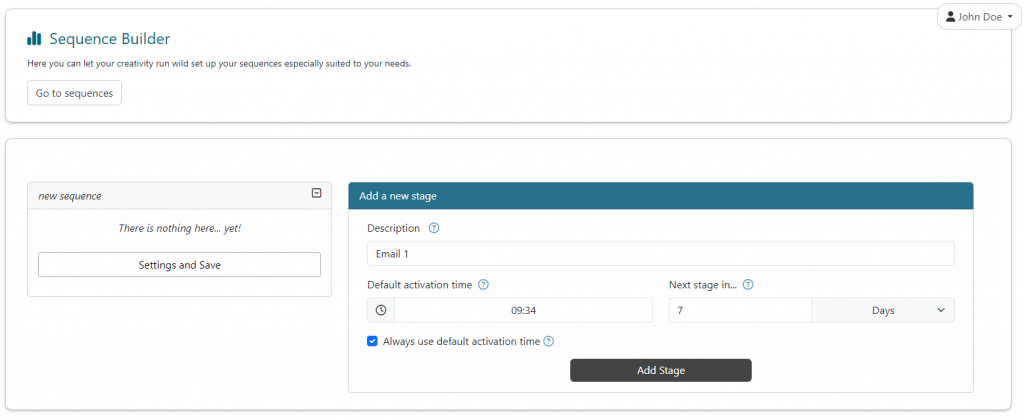
Start by giving your stage a description (if you want), for example “Email 1”.
Then you can choose a default activation time* for the time you want the actions in the stage to be executed.
After this, you choose how long a stage is (before a contact is moved to the next stage) by selecting a number and time unit under “Next stage in…”.
When you are ready to add the action(s) for this stage, choose “Add stage” to save the stage and get access to actions.
*There is an option to not use the default activation time, but that is mostly in use for sequences connected to for example a Signup Form, where contacts will be added at random times and the action(s) should be executed immediately and not scheduled. Also, if a contact enters this stage after the default activation time, the stage will be activated instantly for this contact.
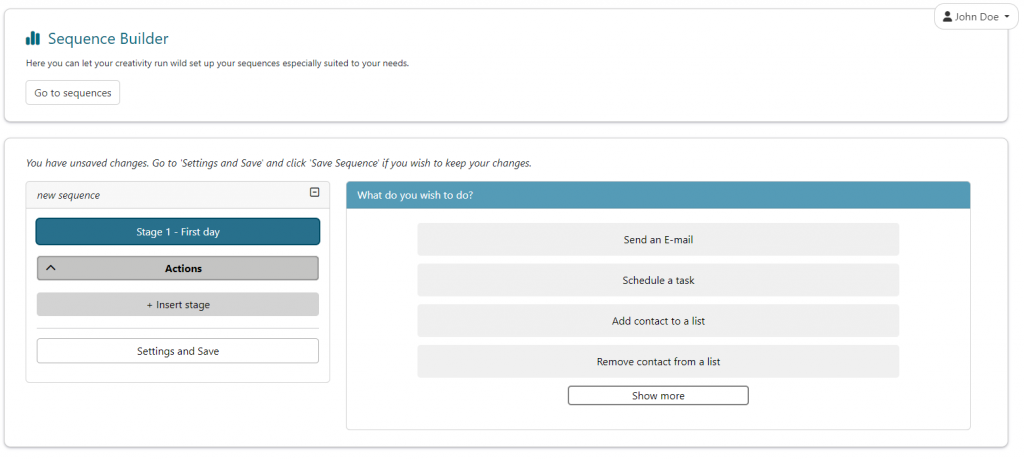
After the stage is created, some new options will appear in the left part in the Sequence Builder.
To add an action, like sending a email, choose “Actions” under “Stage 1 – First day”, and then select “Send an E-mail”:
This will open up the settings for the email actions in this stage. Start by choosing the senders name and email address (it will be automatically filled out with your users Name and Email address by default):
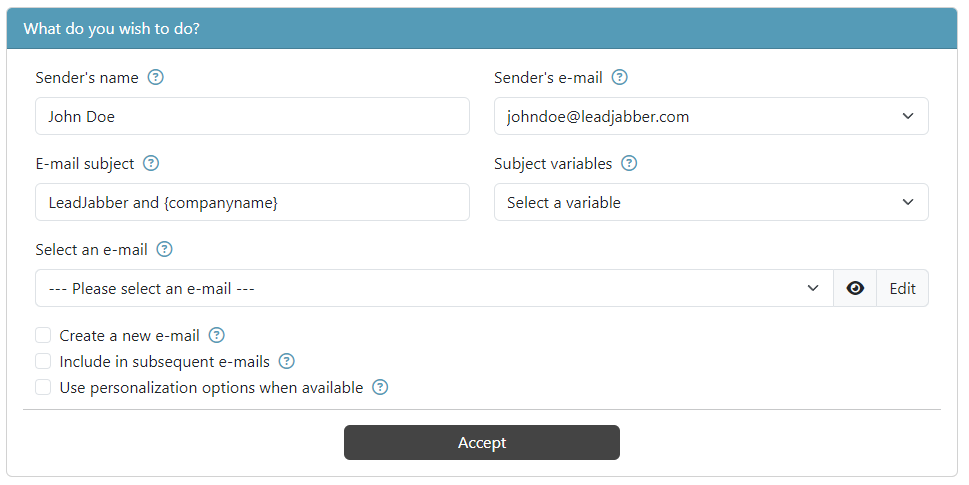
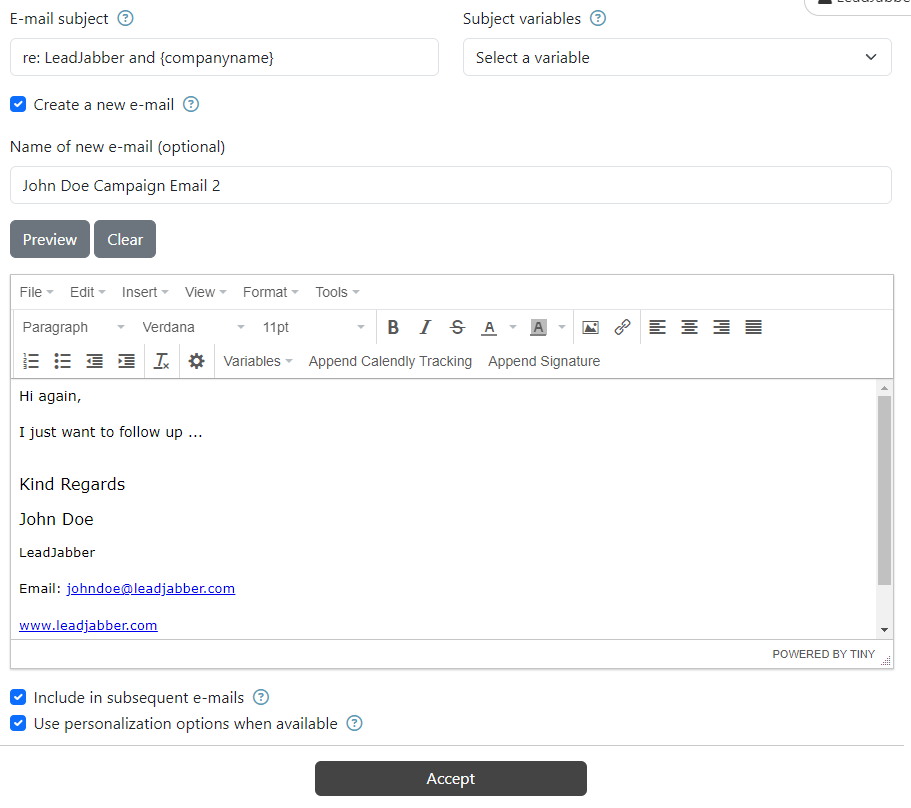
Then you fill out the email subject, here you can also use variables from the contact, like “companyname”, “firstname” etc. You can choose the different variables from the “Subject variables” dropdown, and it will add the variable to the subject for you.
Next up is selecting email content. You can make this content outside the builder, save it and then choose the saved email template by using the dropdown menu for selecting an email, but wel will create the email on the fly here.
To start creating the email, check the “Create a new e-mail” checkbox beneath the email selector:
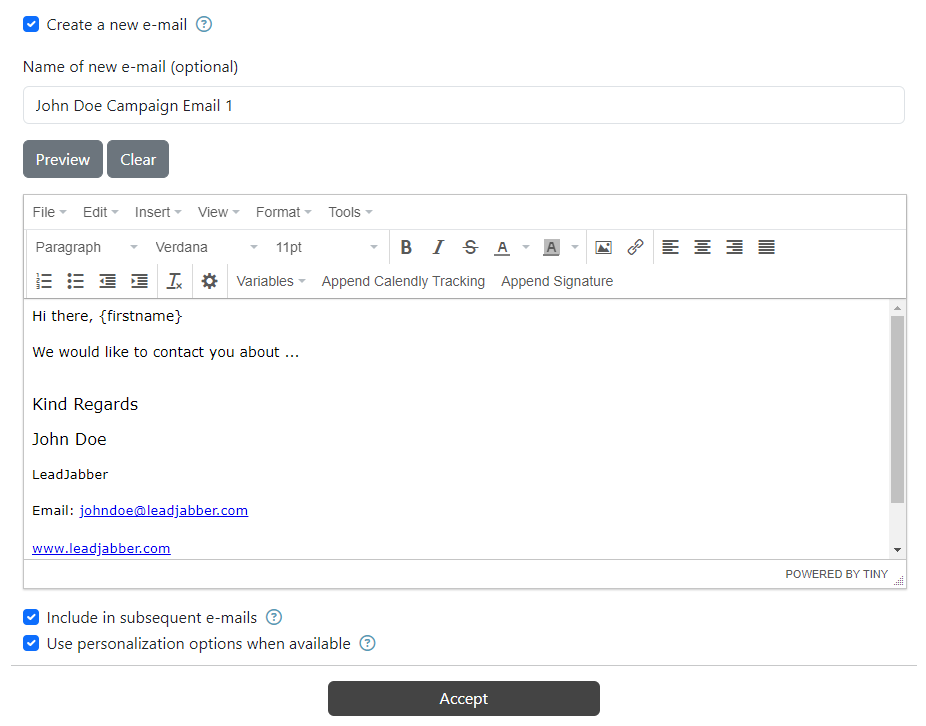
This will open up the Email Editor. Start by giving the email a name (use a recognizable and realatable name, so it’s easy to find and edit later if needed).
The email editor will open with your user’s saved signature in the content. You then begin filling out the content of the email.
You can paste variables from the contact(s) by using the “Variables” dropdown in the editor menu.
You can also preview what the email will look like by choosing “Preview” and then selecting a contact.
When you are finished creating the first email of the sequence, you have two more options that we recommend checking:
Include in subsequent e-mails: This option will add the email you created under the next email in the sequence, like a thread for the contact to follow. This is good for the receiver to see what you have tried to communicate already, so they don’t have to look up your last email if they didn’t reply to that.
Use personalization options when available: This will make it possible to edit the template when adding and sending to a single contact in the sequence, for example if you want to tweak a part of the message to that particular contact.
When you are happy with the content of the first email, click “Accept” to save and add the next stage.
To add the next stages and emails, after completing the first one, select “+ Insert stage” on the left side of the Sequence Builder:
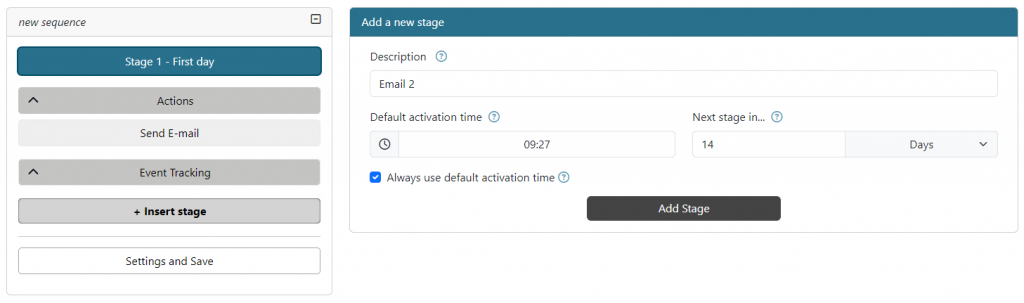
Then you fill out the information the same way as you did in the first stage, like in the example above. Click “Add stage” when you are ready to add action and choose “Send an E-mail” to add an email to the stage:
Notice that it will fill out the subject with the previous stage’s title, but with an “re:” in front. This is so the receiver can see by the subject that this is a follow up email.
Repeat the process of the previous stage, give the template a name, fill out the content of the follow up email, check the options and choose Accept.
Repeat the process for as many stages as you like.
When you have added the stages and actions you want to the sequence, it’s time to save it and activate it, so you can start sending out emails to your contacts.
Start by selecting “Settings and Save” in the bottom of the menu on the left of the screen:

Give the sequence a name and choose who is responsible for the sequence (this person will receive the replies and handle what to to with them in their Engager). By default, your logged in user is Responsible, but you can choose another by unchecking “You are responsible for this sequence”.
Next up is settings for what will happen if someone does or doesn’t reply to the emails in the sequence. By default it is set to remove the contact from the sequence if they reply, and adding them to an auto generated list (based on the name of the sequence), and adding them to a “no reply” list if they do not reply within the time specified in the last stage of the sequence.
After this, you have Calendly options and unsubscribe settings:
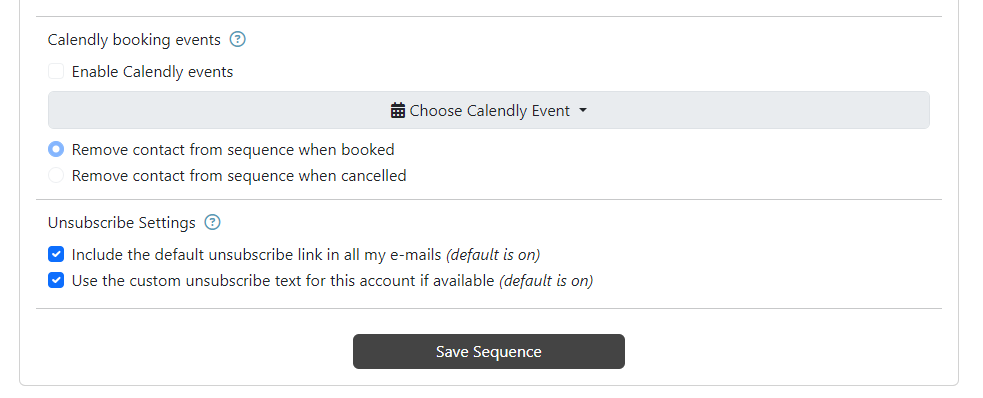
If you have connected a Calendly account to your LeadJabber account (read more about this here), you can choose to take out the contacts when the contacts book an event connected to the sequence/content and/or if they cancel the booked appointment.
Lastly, choose if you want to include the unsubscribe link at the bottom of the emails, and/or if you want to use a custom unsubscribe link (you can edit this text under “Contacts & Lists” – “Unsubscribed” – “Custom unsubscribe link”).
Click “Save Sequence” when you are ready, and you will be prompted to activate it or not in a popup window:
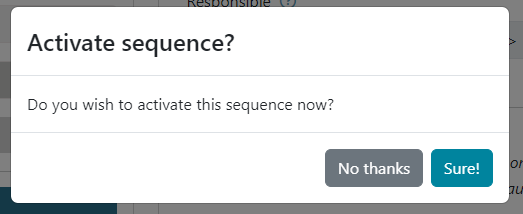
Choose “Sure!” to activate the sequence (or “No thanks” if you want to activate it later), and the Sequence will be ready to start sending out your campaigns.
That’s it, you have successfully set up your sequence, next up is how to add contacts/lists to you sequence for sending out campaigns!