This guide provides information on working with lists in LeadJabber.
LeadJabber uses lists of the contacts in the CRM as the main segmentation tool. Lists are created and managed in several ways, and will go into depth about this here.
Creation of lists are usually made manually by going to “Contacts & Lists” and then “Contact lists”, but they can also be created when creating a sequence and imporing contacts. Let’s start with the manual way.
To create a list manually, go to “Contacts & Lists” and then “Contact lists”. Here you will get an overview of all the contact lists for your account, with some information for each list.
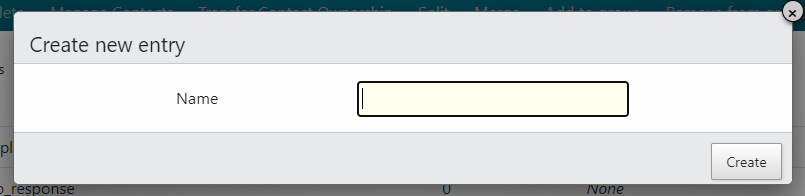
To create a new empty list to fill out with contacts (either manually by managing it or through for example actions in sequences), click “Create” in the menu above the lists and choose “Empty list”. Give it a name, and you have created a new, empty list for managing.
You can also create a list based on contacts that have not replied or contacts that has been set to not interested for a sequence in a given time-range.
Sometimes, you might want to create a list of contacts who didn’t respond within a given time period, to use for follow-up sequences for example.
To do this, go to “Contacts & Lists” and then “Contact lists” and click “Create” in the menu above the lists. Choose “No response”, then, in the next window, select the sequence you want to get contacts from, and choose a time period.
This will make a list of all contacts that went through the sequence and were set to “Done” without replying to the email in that time period.
Sometimes you might want to create a list of contacts that have answered that they are not interested, for example for creating “Stop-lists” or generating statistics.
To create these kind of lists, go to “Contacts & Lists” and then “Contact lists” and click “Create” in the menu above the lists. Choose “Not interested”, then, in the next window, select the sequence you want to get contacts from, and choose a time period.
This will generate a list of contacts from that sequence that have been set to Not Interested in the Engager within that time period.
There are other possibilities and situations where you can create lists in LeadJabber, we will go through them here.
When you create a new sequence (or edit one), you will get an option to create lists for contacts that have replied and/or not responded to the emails in the sequence.
Choosing this will create lists connected to the sequence, adding contacts from the sequence based on what they do in the sequence.
When you import contacts from a file, you will get an option to create either a new list containing the contacts you import or adding them to an existing list. To create a new list there, give it a name in the first step of the import process.
There are several ways to manage lists in LeadJabber, both manually and automatically.
To manage the contacts (adding or removing) in a list manually, you can go to “Contacts & Lists” and then “Contact lists”, where you will find all your contact lists.
Mark the list you want to manage, and click “Manage Contacts” to open the list.

From here, you can can choose how many rows/contacts you will see for each page by clicking the Display-icon above the contacts and choosing the number of rows (if you want to bulk edit more at the same time), and you can also choose which columns of contact data you wish to display by clicking “Columns” under the same Display-icon in the menu, and check/uncheck the data you want.

To add contacts, click the “Add more contacts” button above the list of contacts. From the next view, you can search for contacts you want to add and mark them, then select “Save changes” next to where it will say “Add Selected” when you start marking contacts, or, if you want to make a list of all your contacts, you can choose “Add all” instead and then “Save changes”
To remove contacts, you can from the list view mark the contacts that you want to remove and then select “Remove Selected” and then “Save Changes” when you are done. If you want to empty the list, you can click “Remove All” and then “Save Changes”.
You can also add or remove a contact to/from a list by going to “Contacts & Lists” – “All contacts”, then search for the contact and click the name of the contact to get to the contact card.
Alternatively, if the contact has a company, you can go to “Contacts & Lists” – “All companies”, search for the contacts company name and double click the correct company name to get a list of contact associated with that company, then click on the name of the contact you want to add to a sequence to open their contact card.
Once you are in the contact card of the contact you wish to add or remove from a list, you can add them by clicking on the “Contact lists” section for the contact, then “+ Add” to select a list and add the contact to that list. To remove the contact from a list in this view, click the “thrashcan” icon for the list you want to remove the contact from.
You can also have situations where you manage contact lists by what happens in sequences.
When you create or edit a sequence, you can set up “Add to a list” or “Remove from list” as actions in a stage.
Adding to a list as an action can come in handy if you for example want to have a “middle stage” where you add the contacts that have not replied to a list for follow up on the phone.
To set up an action for either adding or removing contacts from a list, make sure you have created a list for this purpose and choose that list when adding that action in a stage in the sequence builder.
When dealing with lists, you might feel the need to manage the lists themselves for different reasons, and you can do several things when you are in the lists view under “Contacts & Lists” and “Contact lists”.
You can split a list into several smaller chunks by marking the list, then click “Split” in the menu above the lists.
This will give you the option of splitting into a given number of contact lists, which will distribute the contacts in the main list evenly into the number of lists you choose.
You also get the option to split into a number of contacts per list. This will create new lists with the number of contacts you choose until you have distributed every contact from the list to those lists.
You can also merge two lists into a new list by selecting one of the lists then clicking “Merge”.
In the next view, you can search for and select the list you wish to merge with, and then give the new, merged list a name. If no name is given, LeadJabber will generate one based on the merged lists.
To edit a list name, simply click on the name of the list to edit it, then press Enter/Return when you are finished.
To delete a list in LeadJabber, mark the list, then click “Delete” in the menu. You will be prompted if you really want to delete the list.
You can transfer the ownership of the contacts in a list in LeadJabber. This might come in handy if you have multiple users and wish to change who owns and has responsibility for contacts.
To do this, create or choose an existing list of contacts, then click “Transfer Contact Ownership”, then choose the user you want to transfer ownership to.
You can create list groups in LeadJabber, for example a group for customers and a group for prospects, and make lists parts of these groups.
To create a list-group in LeadJabber, go to “Contacts & Lists” and then “Contact lists”. At the top, click on the button that says “Show Groups”.
In this view you can create a new group by clicking “Create” and give the group a name and description, then choose if this is a group accessible for every user or just your user.
To delete a list-group in LeadJabber, go to “Contacts & Lists” and then “Contact lists”. At the top, click on the button that says “Show Groups”.
Select the group and click “Delete” to delete the group. You will be prompted if you really want to delete the group.
To add or remove a list to a group in LeadJabber, go to “Contacts & Lists” and then “Contact lists”. Mark the list you want to add or remove to/from a group, then choose “Add to group” and then choose the correct group, or you can remove them by clicking the list and then choose “Remove from group”.